The straight grain
In order to make a toile of any garment, the most essential thing to understand is the importance of the straight grain on the fabric from which it is made. Each panel of the garment will have its own straight grain and it is their relationships to each other that create the style and fit. Even with no knowledge of historic garment tailoring a lot can be learnt about an item of clothing by studying the positions of the straight grain on each of its component parts. It is impossible to overemphasize the importance of the straight grain in garment construction. Its manipulation enables tailors and dressmakers to create garments to fit the different historical profiles created by the changes in the style of underwear at the time.
The straight grain on a length of fabric refers to the warp (see figure 7.4). These are the threads running parallel to the selvedge2 down the length of a piece of cloth. They are the strongest yarns, making the straight grain the dominant grain. The weft grain is the yarn that runs across the width of fabric and is usually the weaker yarn. The warp and weft grains hang differently, so establishing the exact position of the straight grain on a garment is essential when creating a pattern for a toile.
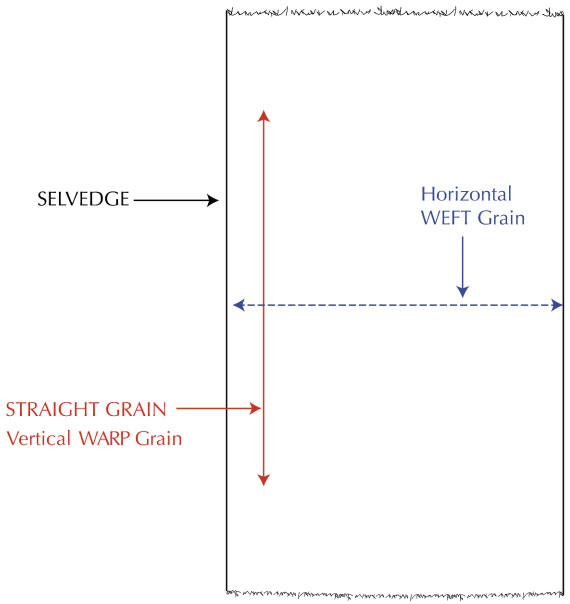
Figure 7.4 Diagram of a length of cloth showing the position of the straight grain marked in red, parallel to the selvedge down the side of a length of cloth. © Author.
The following photographs show toiles of bodices from c.1810, c.1878 and 1902 made in fabric with a warp stripe to emphasize the straight grain position. The straight grain follows the line of the stripes. The patterns used for the toiles are not taken from specific garments, they are adapted from examples found in Janet Arnold’s Patterns of Fashion 1 & 2, and Norah Waugh, The Cut of Women’s Clothes 1600–1930. The patterns capture some of the most common features seen in garment styles at the time.
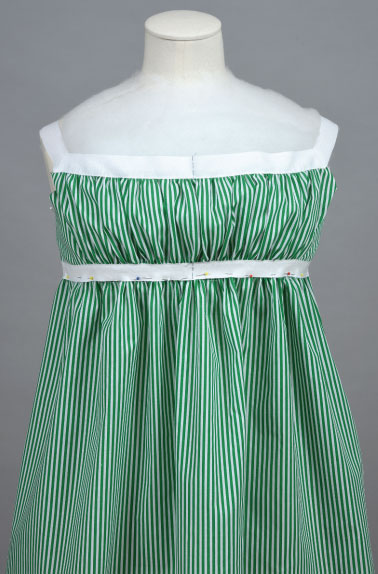
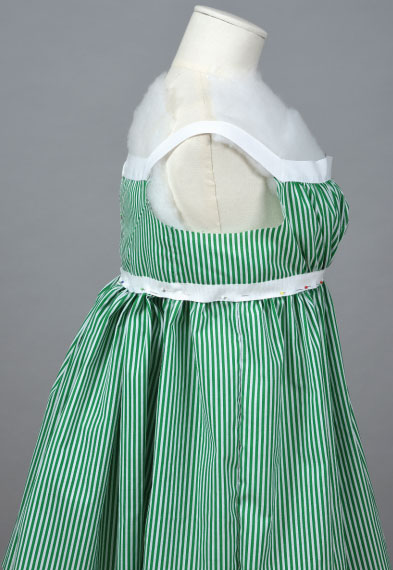
Figure 7.5a and b Striped toile of bodice c.1810 front and side views. This short bodice has the straight grain parallel to the centre front, the sides and the centre back. The gathers across the front bodice create the fit over the bust and bias seams at the back a smooth fit around the back. © Author. Photography Peter Greenland.
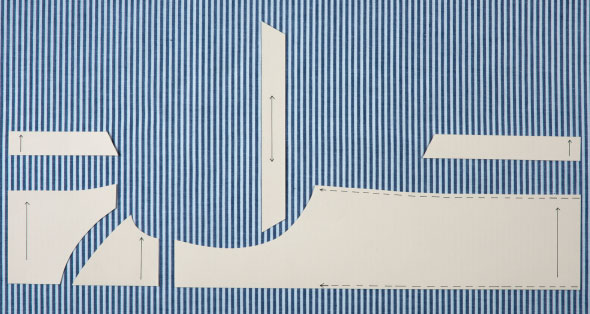
Figure 7.6 Photograph showing the pattern pieces laid out on striped fabric with the straight grain parallel to the stripes in the fabric. © Author. Photography Peter Greenland.
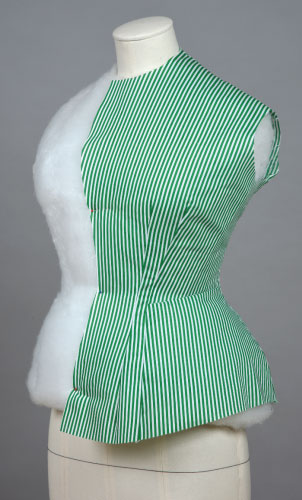
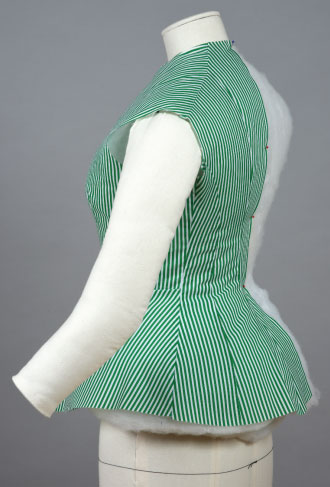
Figure 7.7a and b Striped toile – bodice front and bodice back. In this bodice from c.1878 the straight grain is placed through the centre of the darts at the front and the shaped seams at the back, pulling the fabric tight against the body through the waist. The unusual horizontal darts at the waist on the side front panels remove wrinkles caused by the curvaceous shape of the bodice. The centre front edge is also curved to give the bodice a shapelier silhouette and better fit over the bust. © Author. Photography Peter Greenland.
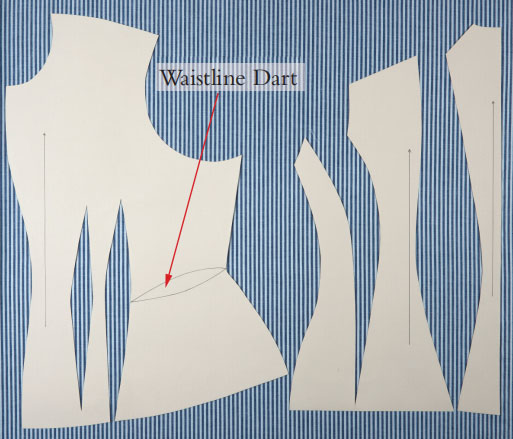
Figure 7.8 Photograph showing the panels of the bodice pattern laid out on striped fabric with the straight grain parallel to the stripes and through the centre of the darts and shaped seams on the back. The unusual horizontal dart at the waistline is also shown. This removed wrinkles around the waist caused by the curvaceous shape of the bodice. © Author. Photography Peter Greenland.
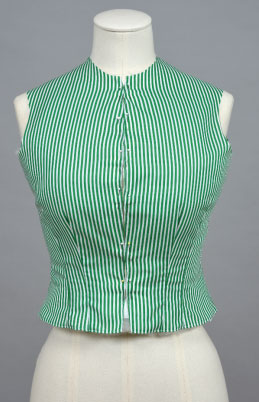
Figure 7.9a Striped toile – Bodice front. In this bodice, c.1902, the shaped centre front seam over the bust allows the bust to widen across the chest creating the fashionable mono bosom profile at the time. Placing the straight grain parallel to the side of the body and through the centre of the waist darts ensures a smooth fit down the sides and through the waist. © Author. Photography Peter Greenland.
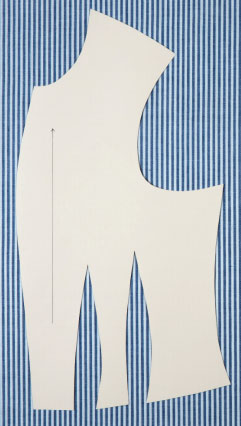
Figure 7.9b Front bodice pattern laid on striped fabric showing the curved centre front seam. © Author. Photography Peter Greenland.
The straight grain also controls how a skirt will hang when it is worn (see figures 7.10a and b). The same A-line skirt is shown in the first image, with the straight grain at the centre front and centre back, and in the second, with the straight grain at the sides. A much wider and more ‘fluted’ silhouette is achieved when the straight grain is at the sides and the bias at the centre front. This is a very important consideration when creating display petticoats for garments. If the petticoat is not cut with the straight grain in exactly the same position as on the original skirt it will never give full support and in a worst-case scenario could distort the silhouette.
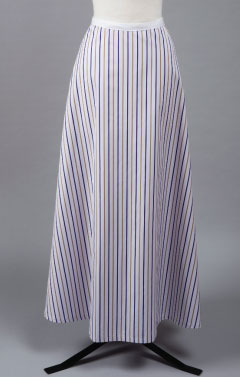
Figure 7.10a A-line skirt with the straight grain at the centre front and centre back. © Author. Photography Peter Greenland.
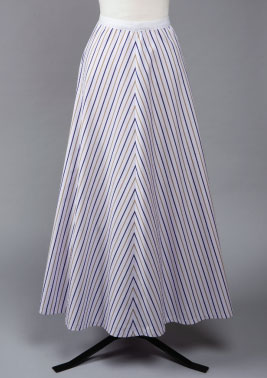
Figure 7.10b A-line skirt with the straight grain at the side seams. © Author. Photography Peter Greenland.
Locating the straight grain position on historic garments
The red lines in the images in figures 7.11a–f indicate the position of the straight grain.
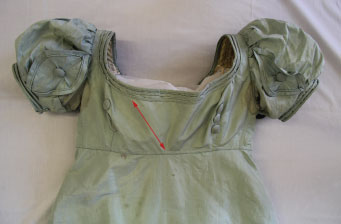
Figure 7.11a In this dress the centre front bodice is cut on the bias giving a smooth fit over the full bust created by the corset worn underneath. Further shaping is added to the bust in the form of darts originating at the high waist position.
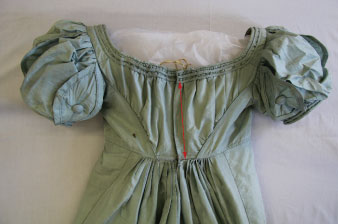
Figure 7.11b The back panels of the bodice are cut with the straight grain at the centre back and a bias seam joining them to the side back panels. The shaped seam gives a smooth fit around the bottom of the shoulder blades and across the ribs at the back.
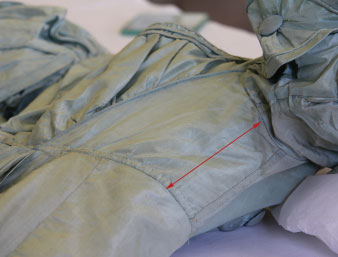
Figure 7.11c The side seam on the side back panel is cut on the straight grain following the red line in the image. This flattens the fabric at the sides of the bodice pulling it tightly against the body.
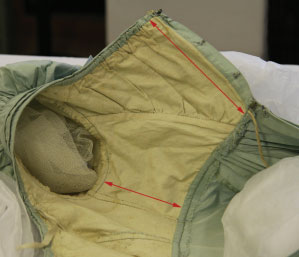
Figure 7.11d The position of the corresponding straight grain lines on the lining are clearly visible at the side seam and centre back.
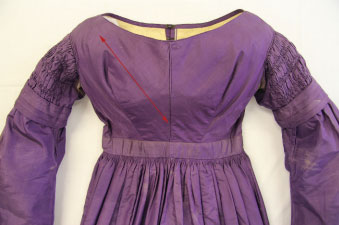
Figure 7.11e In this purple silk dress with a slightly longer bodice from 1836–40 the seam in the centre front is cut on the bias. It also has large waist darts giving additional shape to the bust.
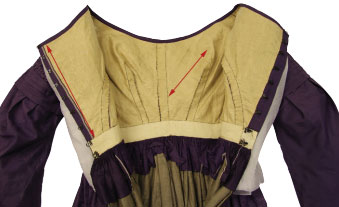
Figure 7.11f The back bodice is cut on the straight grain but the centre back seam is not. It is shaped in at the waist. The selvedge can be seen on the edge of the centre back facing. It is closer to the edge at the neck than at the waist giving a tighter fit at the waist. Figure 7.11a–f © The Bowes Museum, Barnard Castle, County Durham, England. Photography Robbie Pettigrew.
Figure 7.11a–f Pale blue silk dress 1825-28 and purple silk dress 1836-40. © The Bowes Museum, Barnard Castle, County Durham, England. Photography Robbie Pettigrew.