RAISING THE WAISTLINE
When displaying a dress with a short bodice, or a separate bodice and skirt, it is essential to have the hip padding at the correct height to support the skirt and maintain the correct position of the waistline (see figure 6.16). Without firm support around the hips the skirt could slip down, leaving a gap at the waist between the bodice and the skirt. It is very difficult to correct this problem later without adding more petticoats under the skirt. This is not only very time-consuming but also detrimental to the skirt as the need to remove it in order to add more layers and replace it will cause additional handling.
SLOPING THE SHOULDERS
For most of the nineteenth century the fashionable female silhouette included an elegant sloping shoulder line. Bust forms today have very square shoulders and it will be necessary to add triangles of wadding to reshape the angle of the shoulders. With the point of the triangle towards the arm and the thickest part at the neck, start with a small triangle and add increasingly larger triangles until the correct shoulder angle is achieved (see figure 6.17).
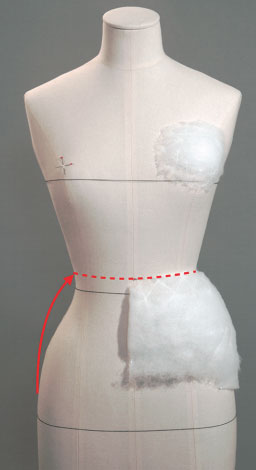
Figure 6.16 Raising the waistline and hips. © Author. Photography Robbie Pettigrew
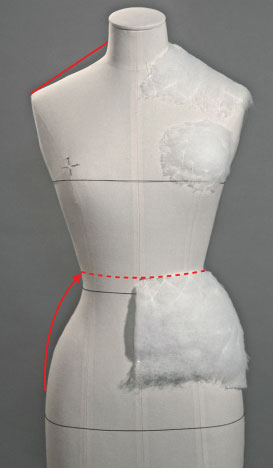
Figure 6.17 Sloping the shoulder line. © Author. Photography Robbie Pettigrew.
SHAPING THE HIPS AND CREATING A BUSTLE
Additional wadding can also be added at the back of the hips to give the effect of a bustle. This will give a firm foundation and can reduce the number of petticoats needed to support large skirts (see figures 6.18 and 6.19).
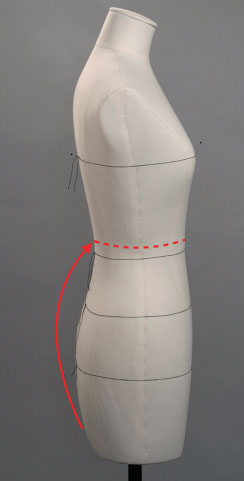
Figure 6.18 Creating an integrated bustle support. © Author. Photography Robbie Pettigrew.
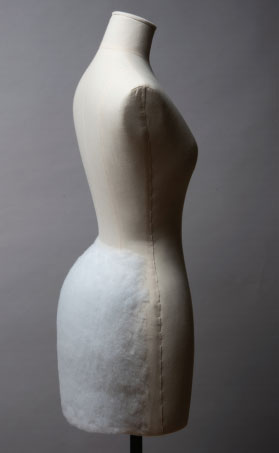
Figure 6.19 Reshaped hips incorporating a bustle. © Author. Photography Peter Greenland.
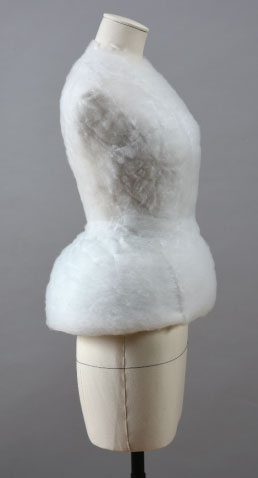
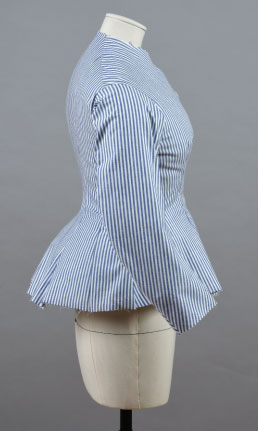
Figure 6.20a and b Side view of the completed padding for a striped toile of a bodice from c.1878 with an integrated shape for a bustle at the back. © Author. Photography Peter Greenland.
SETTING THE HEIGHT OF A BUST FORM ON ITS POLE
Once the bust and waist positions are established and before trying on the garment, measure the skirt length at the centre front and adjust the height of the torso on the pole. For a garment with a long, full skirt requiring many petticoats underneath, this is essential as the weight of all the layers will make adjusting the height of the bust form very difficult when it is fully dressed.
Use the reference images collected around the date of the garment (see Storyboards, Chapter 4) to assess the relationship between the hemline of the skirt and the ground. Even if the skirt touches the ground in the images, it is always advisable in a display to leave a gap of at least 2 centimetres below the hem of the skirt at the front. This will create an illusion of space and lightness and give a more elegant display. Also, should any of the underpinnings relax during the duration of the display, there is less likelihood of the skirt hem touching the floor. With heavy skirts this is always a possibility
Note: the height of a mannequin with legs cannot usually be adjusted so it is essential to decide the finished length of the garment when displayed before purchasing the figure. If commissioning a custom-made mannequin, having the possibility of a height adjustment at the waist is a good idea.
Top covers
The primary purpose of the top cover is to protect the garment from wadding fibres and to facilitate dressing the mannequin. The simplest top cover is a layer of scoured cotton jersey stretched tightly over the wadding and stitched in place. The cover should fit as tightly as possible to provide a firm, smooth foundation for the garment.
COTTON JERSEY TOP COVER
Machine stitching a top cover can be stressful for an inexperienced machinist but as long as the visible seams are machine stitched, it is acceptable to neatly hand stitch some of the unseen seams under the garment, e.g. to tighten the sides of a cover that is slightly loose at the waist for a dress with a tiny waist but a large bust and hips. The most important thing is to achieve a smooth tightly fitting cover with no wrinkles under the garment.
MAKING A TOP COVER FOR A TORSO TO DISPLAY A SYMMETRICAL DRESS
The right side (obverse) of the fabric is placed against the wadding with the wrong side (reverse) visible. One piece of cotton jersey is used to cover the front and another the back of the padded torso, extending from the neck to approximately 5 centimetres below the bottom edge of the bust form (see figure 6.21). For a full mannequin with legs, extend the jersey to 5 centimetres below the crotch. Although jersey does not have a ‘straight grain’ as such, the knitting will have a regular pattern so aim to keep the stitches in-line vertically. Do not let the fabric twist.
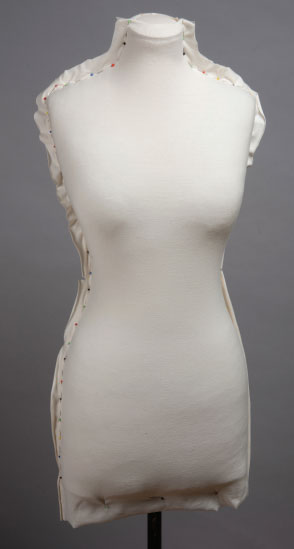
Figure 6.21 Cotton jersey pinned tightly around a padded bust form. © Author.
The front and back are pinned together down the sides. Care must be taken not to pin into the wadding (see figure 6.22).
Stitch the seams by hand just inside the line of pins using a small running stitch. Gently ease the jersey away from the wadding when stitching to help prevent the stitches catching the wadding fibres (see figure 6.23). Leave the thread slightly loose to help prevent it from breaking when removing the cover in order to machine stitch the seams.
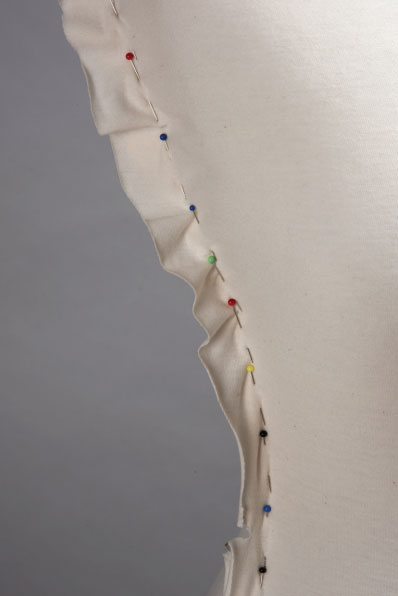
Figure 6.22 Glass-headed pins used to join the side seams of the cover. © Author.
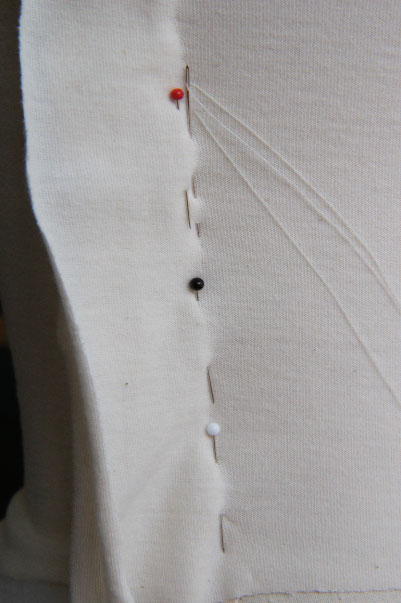
Figure 6.23 Small running stitches used to join the front jersey to the back stitching inside the pins. © Author.