Net petticoats
Stitching the gathered net to a narrow cotton tape waistband is a good way to control the gathers at the top around the mannequin waist (see figures 8.9 and 8.10). Use a wide zigzag machine stitch over the gathering to attach it to the tape. Leave an extra 2 centimetres of tape at each end. Place the ends of the net edge-to-edge, turn under one end of the tape, overlap the other and stitch flat.
Net is very versatile and it is possible to create many different silhouettes depending on how it is cut and gathered. When deciding which type of net petticoat will be best for your garment look at its overall silhouette and see which parts of the skirt will need more support. If the skirt flares out at knee level, this could be a good place to start the lower tier of net on your petticoat. If the skirt has heavy hem decoration, a frill added to the hem of the base petticoat under the net petticoat could help prevent the hem from collapsing (see figure 8.11a and b). If the skirt is dome-shaped, c.1840, having two tightly gathered layers of net on top of each other at the waist can work well. Use two to three widths of net for each layer and pull the gathers tightly to fit the waist. This concentration of net at the waist will create the dome shape required. If a more exaggerated dome shape is needed, add another gathered net petticoat underneath.
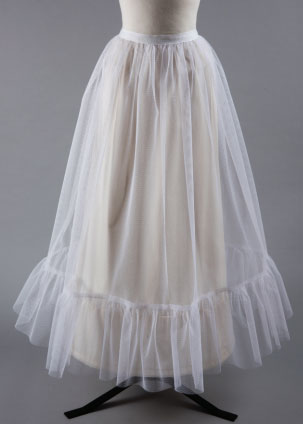
Figure 8.9 Gathered net petticoat over an A-line calico base petticoat to add width at the hem for a dress with a panelled skirt with a fluted hem. © Author. Photography by Peter Greenland.
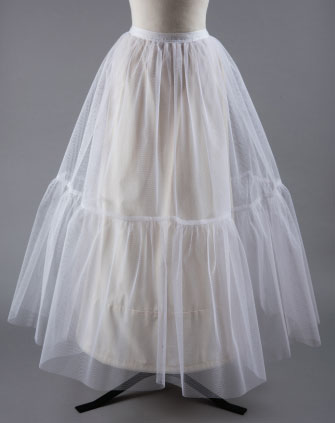
Figure 8.10 Petticoat with a deep frill to prevent a full gathered skirt collapsing around the thighs of the mannequin. Use one width for the upper tier and 2 widths for the frill. © Author. Photography by Peter Greenland.
The waist tapes on the underneath petticoats should by slightly longer to allow them to sit one below the other. Only the waist tape of the top petticoat sits around the mannequin waist. All of the other petticoats should be attached below the position of the waist, to prevent the mannequin waist becoming too big for the garment.
As already mentioned, a single layer of net can also be used over a hoop petticoat to soften the outline (see figure 8.13).
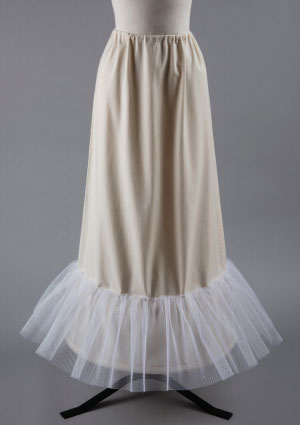
Figure 8.11a Net frills can also be added directly to a base petticoat to prevent a garment with a heavy skirt collapsing at the hem. © Author. Photography by Peter Greenland.
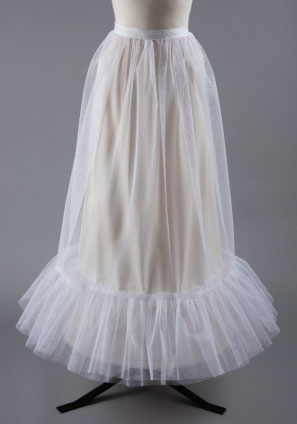
Figure 8.11b Another net petticoat can then be added over the top to give more support around the hips of the skirt. © Author. Photography by Peter Greenland.
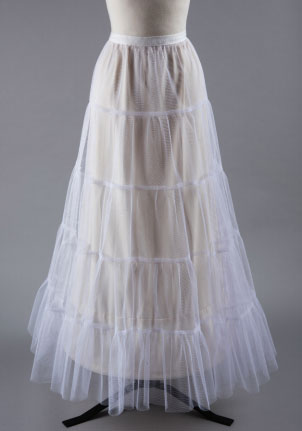
Figure 8.12 Five tiers of net frills gradually increasing in width from the waist to hem give a triangular profile for a full skirt softly fitting the hips and flowing out at the hem. © Author. Photography by Peter Greenland.
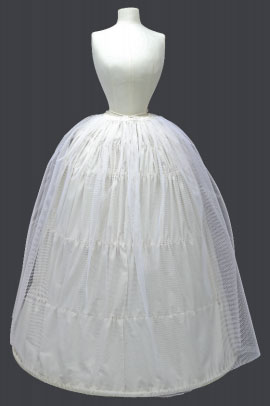
Figure 8.13 A gathered net petticoat over a wide hoop petticoat to prevent the steels in the petticoat from pushing into the garment. © Author. Photography Janie Lightfoot.
New Universal petticoat
The New Universal petticoat has been in use in museums in the UK for many years but has limitations, mainly due to the fact that tapes making the casings for the petticoat steels are stitched flat on to the calico skirt. Over time garment skirts displayed with this petticoat can take on a wavy, corrugated profile. The new pattern was created following research into original hoop petticoat construction where the top cane or whalebone was sometimes wrapped in a fabric casing which fell inside the petticoat and was only stitched on the top edge. Leaving the steel casings free inside the petticoat removes the likelihood of creating a corrugated profile.
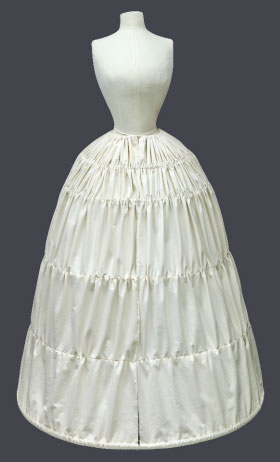
Figure 8.14 New Universal petticoat. © Author. Photography Janie Lightfoot.
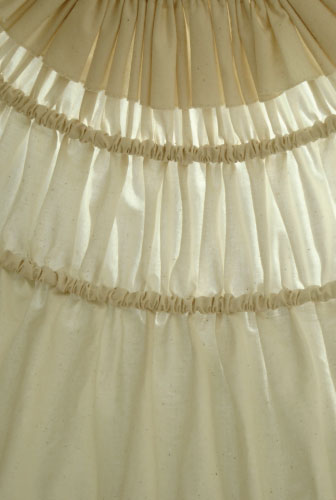
Figure 8.15 Inside the New Universal petticoat showing the steel inserted into tucks inside the skirt. © Author.
New Universal petticoat method
1. A medium-weight calico3 that has been previously scoured works well for a New Universal petticoat. Decide on the finished circumference of the petticoat and add 30 centimetres. This will give a slightly gathered effect over the hoops, preventing the petticoat steel from pushing against the fabric and forming a stiff edge. This can occur if the casing for the petticoat steel is too tight.
Note: This measurement is not the actual circumference of the garment skirt but the circumference of the shadow the skirt would have made on the floor when worn over its original petticoats. For a large skirt, starting with a total circumference of 3 metres works well (2.7 metres + 30 centimetres), giving a finished diameter of approximately 90 centimetres. The fabric is cut along the selvedge to avoid having vertical seams where widths of fabric are joined together which might catch when the steels are inserted (see figure 8.17). The selvedge makes the hem on the bottom of the petticoat.
2. The finished length of the petticoat should be 2 centimetres shorter than the garment skirt. Decide on the number of steels required to create the correct profile. Steels are placed closer together at the top of the petticoat between the waist and the hips to give a more subtle curve when tightened, and wider towards the hem (see figure 8.16b). They also increase in length from the waist to the hem.
CUTTING LAYOUT FOR A NEW UNIVERSAL PETTICOAT, FINISHED LENGTH 101 CENTIMETRES
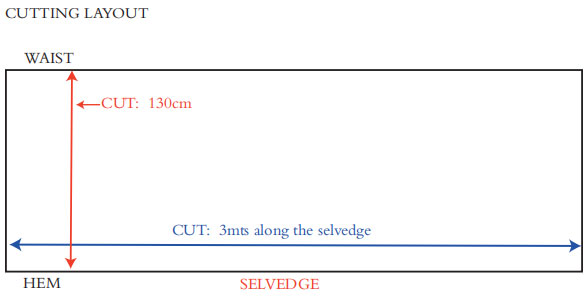
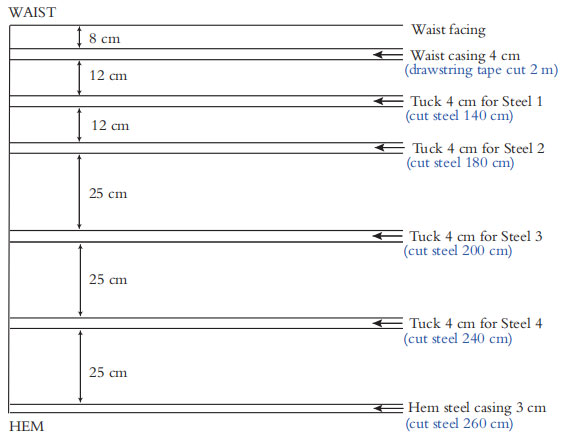
Figure 8.16 a and b Cutting instructions for a New Universal petticoat with five petticoat steels (see figure 8.14). © Author.