‘Join the dots‘ method
This method is the most time-consuming and will take practice to achieve perfection as many measurements are needed. The pattern can be drafted directly on to the pattern paper alongside the garment. Choose a panel and locate the position of its straight grain, the warp of the fabric. If the fabric has a very fine weave, using a magnifying glass or jeweller’s loupe,7 will make locating the straight grain easier. When taking a pattern of a skirt, noting the position of the selvedge, if visible, is also helpful as this runs parallel to the straight grain on the fabric.
The straight grain and weft grain on the panel are marked using two pieces of thread in a contrasting colour (see figures 7.15 and 7.16a). The first thread is laid parallel to the straight grain on a panel of the garment and carefully pinned into a seam at the top and bottom of the panel using fine entomological pins. Pinning directly into historic fabrics can break fragile threads and weaken the weave structure. By only pinning into the gaps made by the stitching in the seams around the panels this can be avoided.
Once the thread marking the straight grain is in position, place a set square at a right angle alongside it and align the second thread with the weft along the top of the set square. Following the weft of the fabric, pin the thread into the seams at either side of the panel. These crossed threads mark the warp and weft grains on the panel and are represented by the crossed lines on the pattern paper.
By taking measurements following the individual warp and weft threads parallel to the crossed threads on the garment and marking them as a series of dots either side of the crossed lines on the pattern paper, the shape of the panel will emerge (see figure 7.16b). Measure either side of the warp thread to ensure that the shape accurately relates to the garment panel (see figure 7.16a). The more measurements taken, and dots plotted, the more accurate the pattern will be.
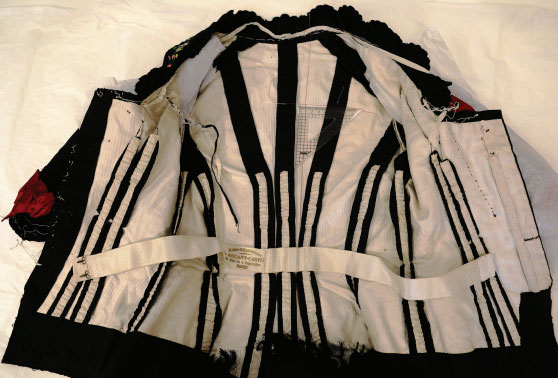
Figure 7.15 Red threads and a set square mark the warp and weft grains on the back bodice panel. © The Lightfoot Textile Archive. Photography Janie Lightfoot.
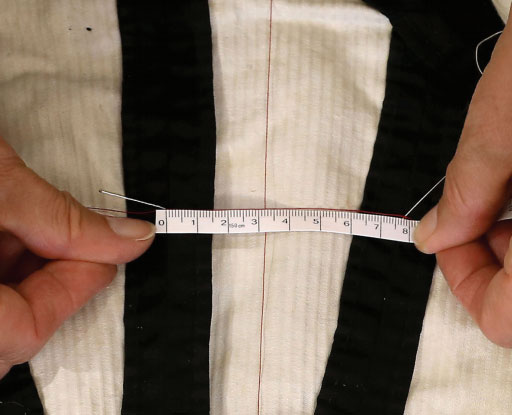
Figure 7.16a Taking measurements either side of the red threads to ensure the balance of the pattern will be correct. © Author. Photography Janie Lightfoot.
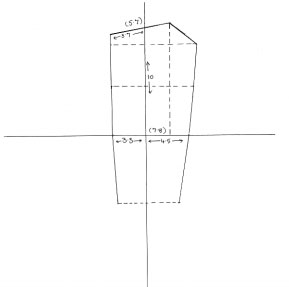
Figure 7.16b Marking the measurements either side of crossed lines on a sheet of paper to create a pattern. © Author.
To finish the pattern, use a sharp pencil to join the dots and a French curve8 to smooth the outline following the curves visible on the garment. A French curve is very useful for marking necklines and armholes. Finally, check the measurements of all the edges around your pattern against the measurements of the seams on the garment. This process is then repeated for each section of the garment.
When finally aligning the lengths of panels joined by a seam, if one edge is longer than the other refer back to the garment and check the length of the corresponding seam. Adjust the length on the pattern pieces to match. Sometimes ease9 is added to give additional fullness to one side of a seam, e.g., in the top of tight sleeves to fit around the shoulder or on the side front panels of the bodice to fit over the bust. Ease is an advanced technique. If you miss out the ease on your pattern your toile will be slightly smaller. For a toile to be used when padding a mannequin or bust form this is not a problem as a smaller toile will give a smaller padded form. Additional wadding can be added later to adjust the fit of the garment. However, if your toile is to create an exact replica of the garment then you will need to incorporate any ease. When making the original pattern for the garment the area to be eased would have been increased to allow more fabric into the seam needing the ease (see figure 7.17).
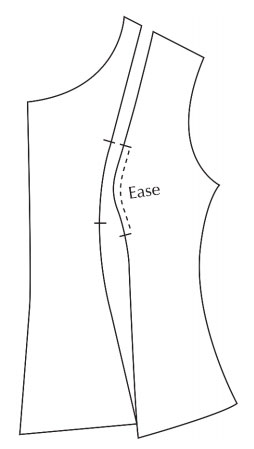
Figure 7.17 Balance marks across the seam indicate the area of the side bodice panel to be eased into the front bodice panel. The ease is necessitated by the more pronounced curve over the bust between the balance marks on the side panel. © Author.
‘Draping‘ method
‘Draping’ is a term borrowed from the fashion industry. It refers to the technique used by designers to visualize the style of a garment by draping fabric directly around the body or a bust form without first cutting a paper pattern (see figure 7.18). When making a toile for conservation purposes, a thin fabric is draped over, or inside, each panel of a garment to make a pattern (see figure 7.19).
The most common fabrics used for draping are fine muslin or cotton voile as they are both easy to manipulate inside a garment. However, for a very fragile garment, a fine organza, although an expensive option, works well. It is particularly good when taking a pattern from inside a fragile, intricately cut bodice, as it is extremely light and has the added advantage of being transparent. Match your toile fabric to the condition of the garment; the more delicate the garment, the lighter the fabric. Experiment with different fabrics and choose the one that you feel gives you the most control.
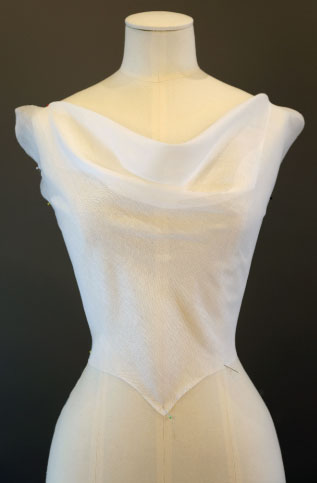
Figure 7.18 Creating a toile for garment with a cowl neckline and a tight-fitting waist by draping fabric directly around a bust form. © Author. Photography Janie Lightfoot.
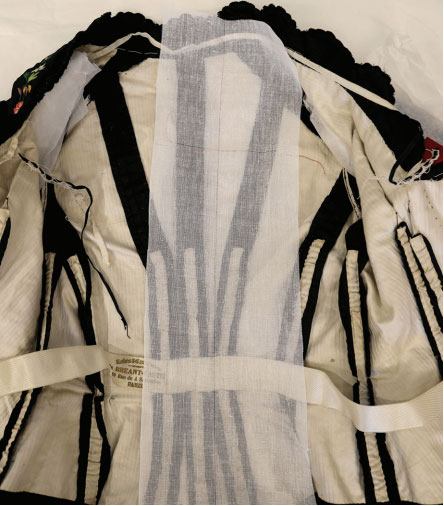
Figure 7.19 Creating a pattern of an existing garment by draping fabric inside. © Author. Bodice courtesy of the Lightfoot Textile Archive. Photography Janie Lightfoot.